許多正在學習如何編寫智能合約的程序員將學習Solidity語言。有豐富的在線教程和書籍資源,將教我們關於Solidity的內容。當與Truffle框架相結合時,Solidity形成了開發智能合約的“殺手”組合。幾乎所有存在於以太坊區塊鏈上的智能合約都是用Solidity編程語言編寫的。
在本文中,我們將探討如何用Vyper編程語言編寫智能合約。
主題
介紹設置環境使用Vyper創建智能合約將智能合約部署到Ganache與智能合約交互與其他智能合約交互以編程方式編譯代碼
介紹
Vyper是什麼?
Vyper是一種面向合約的python編程語言,以以太坊虛擬機(EVM)為目標。 Vyper有非常簡單/可理解的語法:Vyper的原則之一是使開發人員幾乎不可能編寫具有誤導性的程序。
為什麼要用Vyper ?
安全性:在Vyper中構建安全的智能合約應該是可能的。語言和編譯器的簡單性:語言和編譯器實現應該力求簡單。可審核性:Vyper代碼應該最大限度地讓人可讀。此外,編寫具有誤導性的代碼應該是最困難的。讀者的可讀性比作者的可讀性更重要,對於沒有使用Vyper經驗的讀者(以及一般沒有編程經驗的讀者)來說,簡單性尤其重要。
因此,Vyper提供了以下特性:
邊界和溢出檢查:對數組訪問和算術。支持有符號整數和十進制定點數可判定性:可以計算任何Vyper函數調用的gas消耗的精確上限。強類型小而易懂的編譯器代碼對純函數的有限支持:任何標記為常量的東西都不允許改變狀態。
設置環境
Vyper需要Python 3.6軟件。所以,如果我們沒有安裝Python 3.6軟件,我們必須安裝它,然後按照下面的步驟進行:
$ python3 -m pip install --user virtualenv $ pip install vyper $ virtualenv -p python3.6 vyper-venv $ source vyper-venv/bin/activate (vyper-venv) $ pip install vyper (vyper-venv) $ vyper - -version
使用Vyper創建智能合約
現在讓我們用Vyper創建一個智能合約。首先,我們將創建一個擴展名為.vy的文件,並將其命名為hello.vy,如下:
name: public(String[24])@externaldef __init__(): self.name = "Satoshi Nakamoto" @externaldef change_name(new_name: String[24]): self.name = new_name @externaldef say_hello() -> String[32 ]: return concat("Hello, ", self.name)
下面是編譯vyper文件的方法:
(vyper-venv) $ vyper hello.vy
由此,我們將得到以下輸出:
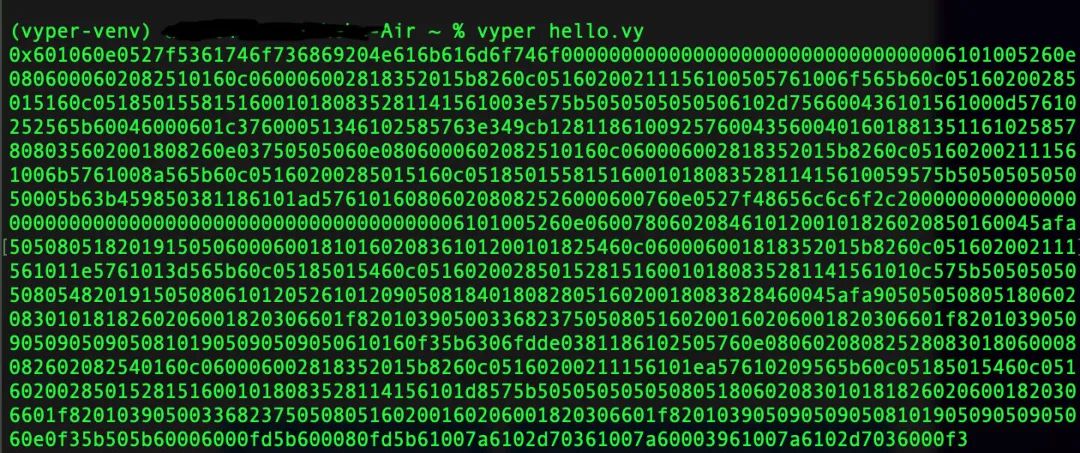
這是智能合約的字節碼。要部署智能合約,就需要字節碼,但要訪問智能合約,需要abi。如何得到abi呢?可以通過以下命令來實現:
(vyper-venv) $ vyper -f json hello.vy
由此,我們將獲得以下輸出:

如果我們想在一個編譯過程中同時得到abi和字節碼,可以在編譯過程中合併這兩個標誌,如下所示:
(vyper-venv) $ vyper -f json,bytecode hello.vy
這將給我們以下輸出:
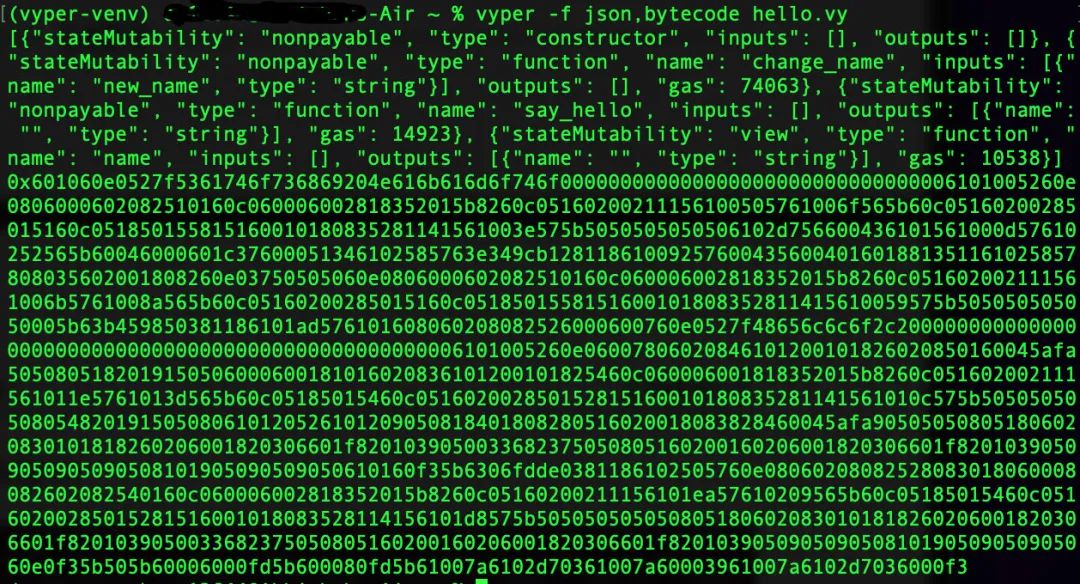
將智能合約部署到Ganache
那麼如何將這個智能合約部署到以太坊區塊鏈中呢?有幾種方法可以做到這一點,但讓我們用一種熟悉的方法來使用Truffle:
創建一個目錄,並使用truffle init初始化它,如下所示:
$ mkdir hello_project $ cd hello_project $ truffle init
設置truffle-config.js如下所示:
module.exports = { networks: { "development": { network_id: "*", host: "127.0.0.1", port: 8545 // port at Ganache running }, } };
創建一個構建目錄,如下所示:
$ mkdir -p build/contracts $ cd build/contracts
然後創建一個Hello.json文件,如下所示:
{“abi”: ”bytecode”: }
然後用編譯過程的abi或json輸出填充abi字段,用編譯過程的字節碼輸出填充字節碼字段。需要用雙引號將字節碼值括起來。不要忘記在abi字段和字節碼字段之間放一個逗號。這會給我們一些類似於下面的東西:
{ "abi": [ { "stateMutability": "nonpayable", "type": "constructor", "inputs": [], "outputs": [] }, { "stateMutability": "nonpayable", "type" : "function", "name": "change_name", "inputs": [ { "name": "new_name", "type": "string" } ], "outputs": [], "gas": 74063 } , { "stateMutability": "nonpayable", "type": "function", "name": "say_hello", "inputs": [], "outputs": [ { "name": "", "type": "string" } ], "gas": 14923 }, { "stateMutability": "view", "type": "function", "name": "name", "inputs": [], "outputs": [ { "name": "", "type": "string" } ], "gas": 10538 } ], "bytecode": ""
然後我們可以通過在migrations/2_deploy_hello.js中創建一個新文件來創建一個遷移文件來部署這個智能合約,如下所示:
var Hello = artifacts.require("Hello");module.exports = function(deployer){ deployer.deploy(Hello); };
一切準備就緒後,啟動Ganache!
然後,在hello_project目錄中,我們可以運行遷移過程,如下所示:
$ truffle migrate
我們會看到類似如下的內容:
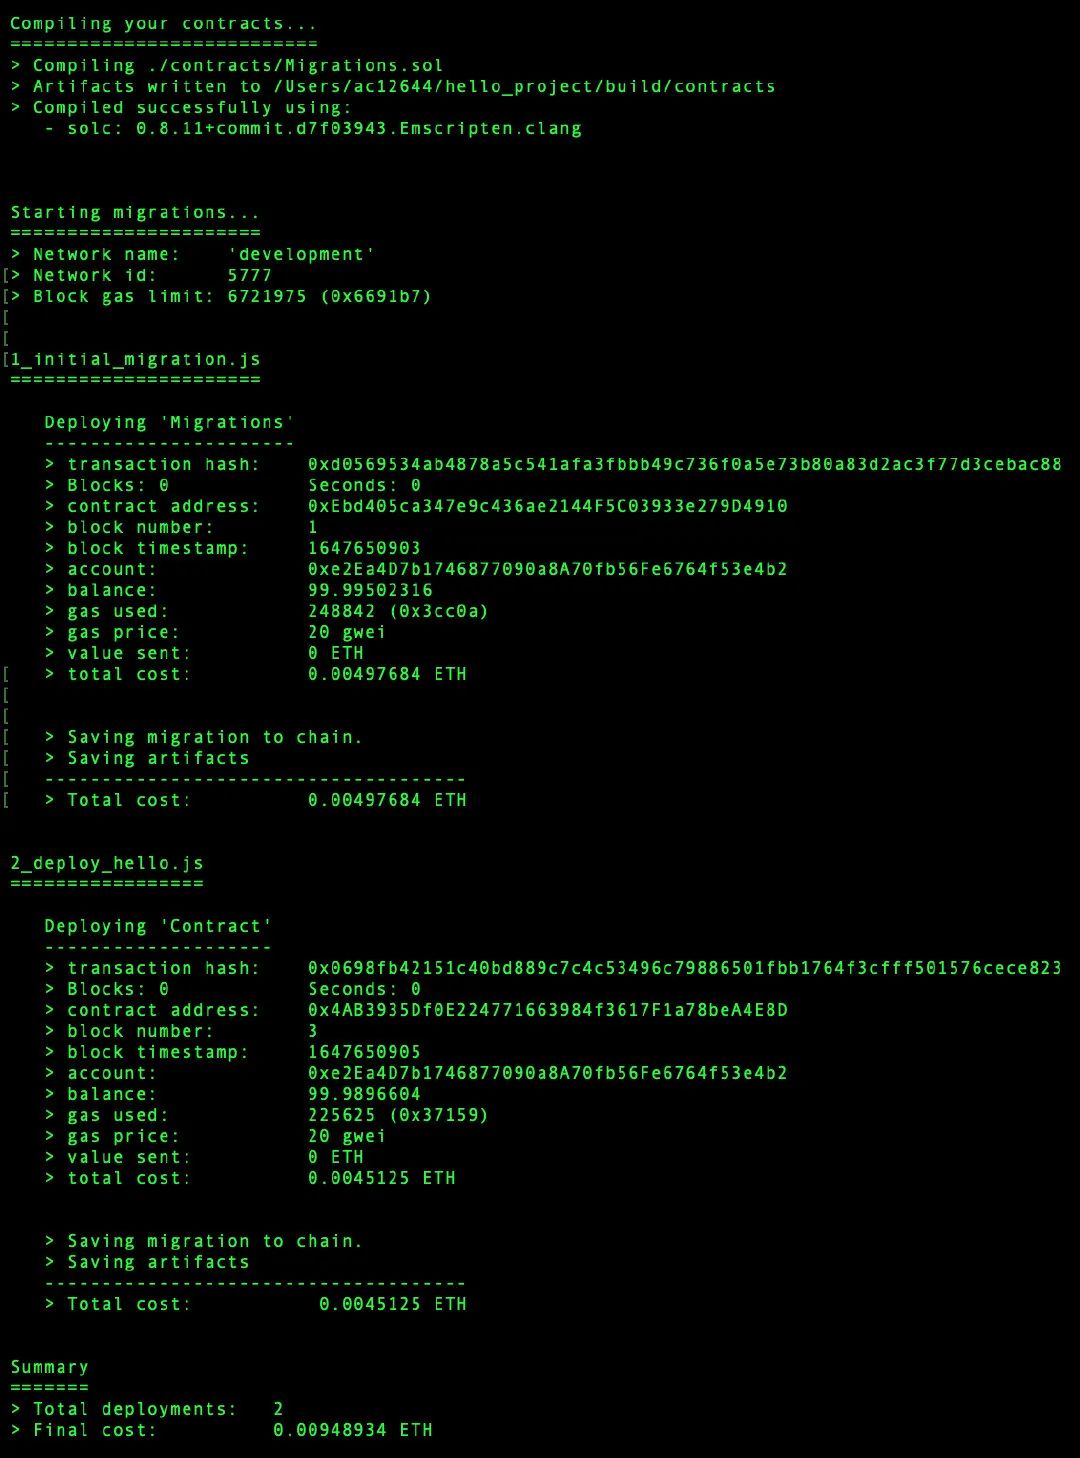
我們用Vyper編寫的智能合約已經部署到Ganache。我們的智能合約地址如下:
0x4ab3935df0e224771663984f3617f1a78bea4e8d
與智能合約交互
正如我們之前所做的,我們可以使用Truffle控制台與我們的智能合約進行交互,如下所示:
$ truffle console
我們的智能合約總是被命名為Contract。我們可以使用以下語句訪問智能合約:
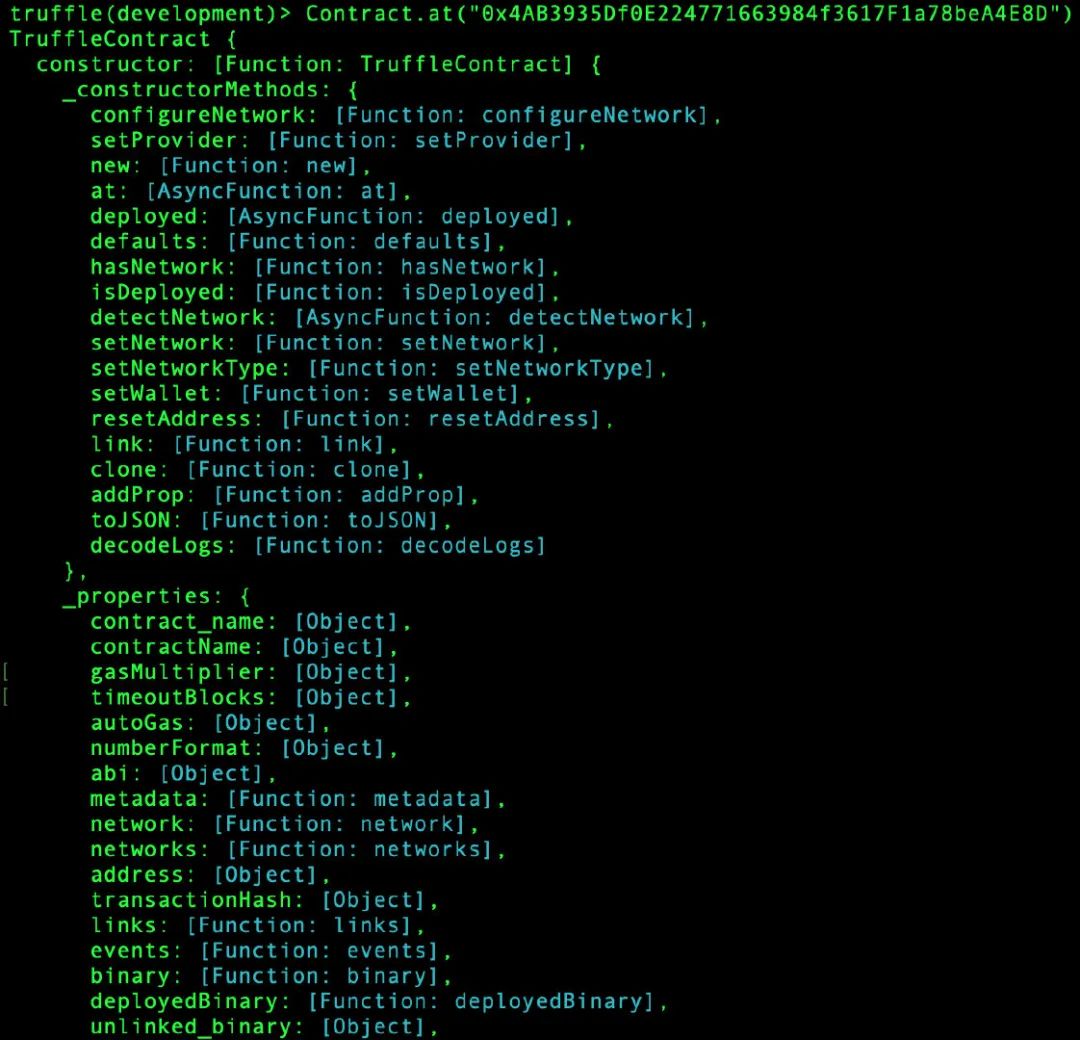
truffle(development)> Contract.at("0x4AB3935Df0E224771663984f3617F1a78beA4E8D")
我們會得到一個很長的輸出,我們可以看到abi,字節碼,等等,如下面的截圖所示:
讓我們用下面的語句來看看智能合約的name變量的值:
truffle(development)> Contract.at(“0x4AB3935Df0E224771663984f3617F1a78beA4E8D”).then(function(instance){return instance.name.call(); }); "Satoshi Nakamoto"
讓我們將名稱更改如下:
truffle(development)> Contract.at(“0x4AB3935Df0E224771663984f3617F1a78beA4E8D”).then(function(instance) { return instance.change_name(“Vitalik Buterin”), { from: “0xb28Fc17791bf66719FBFCc65846B01Fe2726e9E2” } });
from字段中的值來自Ganache中的一個帳戶。我們只需查看Ganache 窗口並選擇自己喜歡的任何帳戶。
輸出:
{from: " 0xb28Fc17791bf66719FBFCc65846B01Fe2726e9E2 "}
改名了嗎?讓我們找出答案。執行如下命令:
truffle(development)> Contract.at(“0x4AB3935Df0E224771663984f3617F1a78beA4E8D”).then(function(instance){return instance.name.call(); });'Vitalik Buterin'
與其他智能合約交互
我們的智能合約可以與區塊鏈上的其他智能合約交互。
地址數據類型不僅適用於普通賬戶,也適用於智能合約賬戶。所以,一個智能合約可以通過捐贈智能合約將以太坊捐獻給我們的受贈人!
重啟我們的Ganache。還記得hello.vy文件嗎?我們想使用自定義名稱部署我們的Hello 智能合約。
我們的遷移文件migrations/2_deploy_hello.js仍然相同,如下代碼所示:
var Hello = artifacts.require("Hello"); module.exports = function(deployer){ deployer.deploy(Hello); };
再次編譯hello.vy文件以獲取接口和字節碼。打開我們的合約JSON 文件,
build/contracts/Hello.json文件。刪除所有內容並替換為以下代碼:
{ "contractName": "Hello", "abi":
我們必須為智能合約指定一個名稱,因為這一次,我們將部署兩個智能合約。如果我們不給我們的智能合約一個名稱,它將有一個默認名稱,Contract。如果我們只想部署一個智能合約,這不是問題。
然後,對於我們的donation.vy,對其進行編輯,並添加以下代碼行:
struct DonaturDetail: sum: uint256 name: String[100] time: uint256interface Hello(): def say_hello() -> Bytes[32]:viewdonatur_details: public(HashMap[(address, DonaturDetail)])donaturs: public(address[10 ])donatee: public(address)index: int128@externaldef __init__(): self.donatee = msg.sender@payable@externaldef donate(name: String[100]): assert msg.value >= as_wei_value(1, "ether ") assert self.index < 10 self.donatur_details[msg.sender] = DonaturDetail({ sum: msg.value, name: name, time: block.timestamp }) self.donaturs[self.index] = msg.sender self .index += 1@externaldef withdraw_donation(): assert msg.sender == self.donatee send(self.donatee, self.balance)@externaldef donation_smart_contract_call_hello_smart_contract_method(smart_contract_address: address) -> Bytes[32]: return Hello(smart_contract_address) .say_hello()
使用下面的代碼,為我們的Donation智能合約創建另一個遷移文件migrations/3_deploy_donation.js:
var Donation = artifacts.require("Donation"); module.exports = function(deployer) { deployer.deploy(Donation); };
編譯donation.vy並獲取智能合約的接口和字節碼。然後,使用以下代碼,為我們的捐贈智能合約創建另一個合約JSON 文件build/contracts/Donation.json:
{ "contractName": "Donation", "abi":
運行遷移。我們可能需要使用——reset,如下所示:
$ truffle migrate --reset
我們將得到以下輸出:
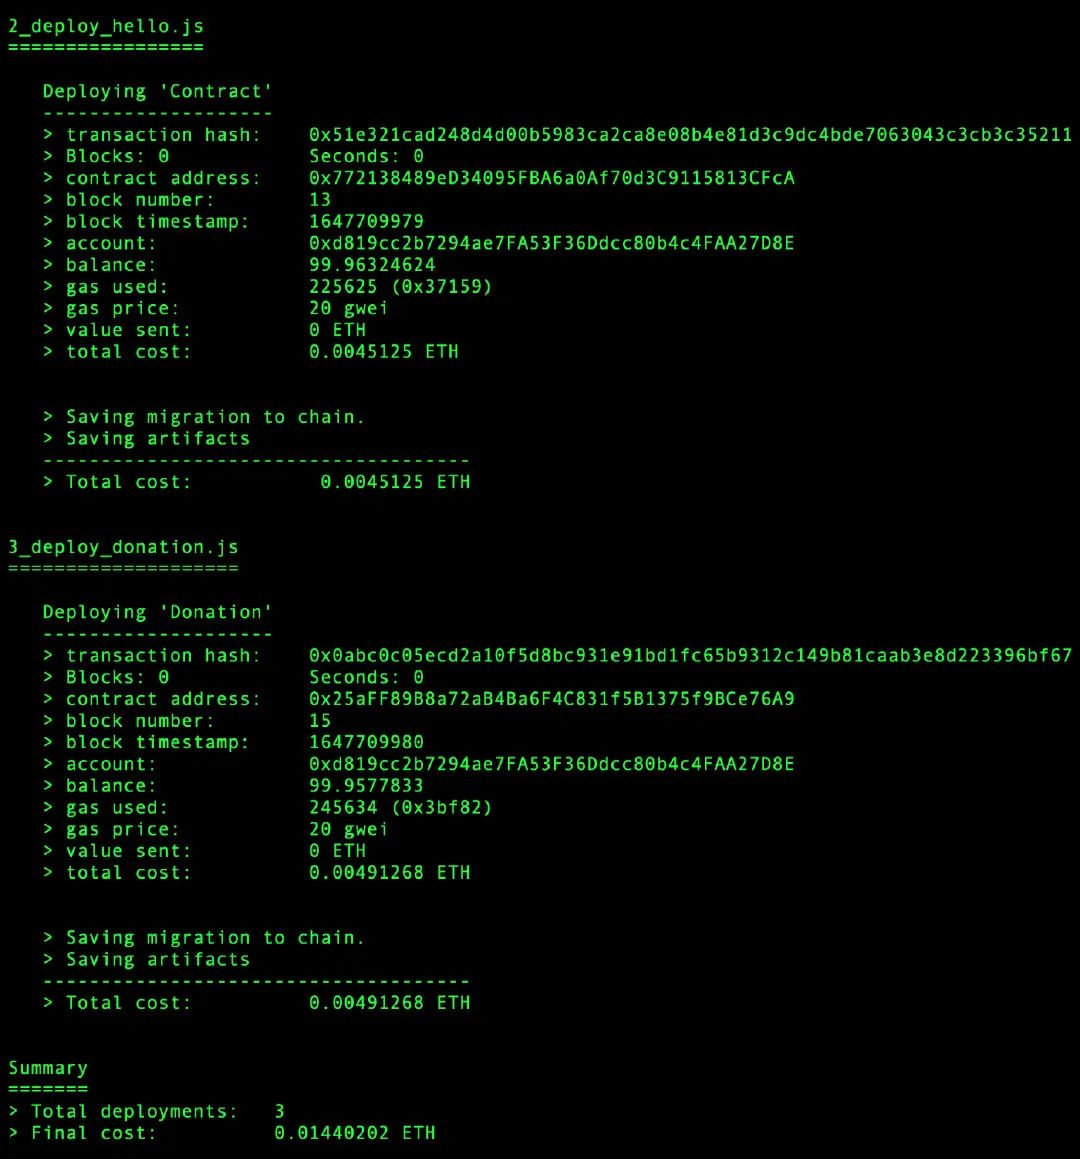
注意Donation智能合約“0x25aFF89B8a72aB4Ba6F4C831f5B1375f9BCe76A9”和Hello智能合約“0x772138489eD34095FBA6a0Af70d3C9115813CFcA”的地址。可能會有所不同。
按如下方式運行Truffle 控制台:
$ truffle console
現在我們的智能合約不再孤單,如下代碼所示:
function(instance) {return instance.donation_smart_contract_call_hello_smart_contract_method.call(" 0x772138489eD34095FBA6a0Af70d3C9115813CFcA ");});
輸出:
“0x48656c6c6f2c205361746f736869204e616b616d6f746f”
以編程方式編譯代碼
我們可以創建一個腳本來編譯Vyper代碼,而不是使用命令行實用程序。確保位於包含Hello.vy和的同一目錄中donation.vy。創建一個名為的腳本compiler.vy,如下:
import vyperimport os, json# You need a Vyper file, the name that you want to give to your smart contract, and the output JSON file. The following code will do this task:filename = "hello.vy"contract_name = "Hello" contract_json_file = open("Hello.json", "w")# Use the following lines of code to get the content of the Vyper file:with open(filename, "r") as f: content = f.read()# Then you create a dictionary object where the key is a path to your Vyper file and the value is the content of the Vyper file, as follows:current_directory = os.curdirsmart_contract = {}smart_contract[current_directory] = content# To compile the Vyper code , all you need to do is use the compile_codes method from the vyper module, as follows:format = ["abi", "bytecode"]compiled_code = vyper.compile_codes(smart_contract, format, "dict")smart_contract_json = { "contractName" : contract_name, "abi": compiled_code[current_directory]["abi"], "bytecode": compiled_code[current_directory]["bytecode"]}# The last code is used to write the result to an output JSON file:json.dump (smart_contract_json, contract_json_file)contract_json_file.close()
如果我們使用以下命令執行這個腳本,我們將獲得一個Hello.json可與Truffle 一起使用的文件,如下代碼所示:
(vyper-venv) $ python compiler.vy
總結
在本文中,我們了解瞭如何使用Vyper編程語言編寫智能合約。首先,我們安裝了Vyper編譯器。然後我們開發了一個智能合約。
通過這樣做,我們了解了Vyper編程語言的大部分特性,包括函數裝飾器、初始化函數和函數權限修飾符。
還有一些數據類型,如地址、整數、時間戳、映射、數組和字節數組(字符串)。我們學習瞭如何將Vyper源代碼編譯為智能合約,然後使用Truffle工具將其部署到Ganache中。我們也通過Truffle控制台與智能合約進行交互。
Source:https://medium.com/better-programming/implementing-smart-contracts-using-vyper-a-python-approach-95f9299e64d8


